Configuring Reports (Including Instances, Drop-Down and Cascading Pick Lists, SQL Pick Lists)
You have three types of Web Portal reports:
- Live Crystal Reports
- Static Crystal Reports (pre-run reports using Report Runner Batch)
- Static URLs (http-based links to pages and/or documents).
Live Crystal Reports
Web Portal depends on an XML "config" file to be created for every live report (these go in the "WebTemplates" directory). These XML config files are the exact same format as a Report Runner Batch XML file with one batch job in it.
You can create your XML templates manually in Report Runner Batch (just create a single-job batch). There's an easier way, though... you can place all of your RPT files that you want to create XML templates for into the INPUT directory of Event Server.
Event Server will AUTOMATICALLY process the RPT files (and also auto-create your static picklists from values stored in RPT files), creating one XML template per RPT file (using same name as report), and placing that new XML template into the Event Server's WebTemplates directory.
Since these XML templates are now in the WebTemplates directory, when you go to add a new report, your XML templates will load and show for all of these reports. There is no limit to the number of reports you place in the INPUT queue either. You can place 10, 50, 100, or 500. It will create the web templates for each one.
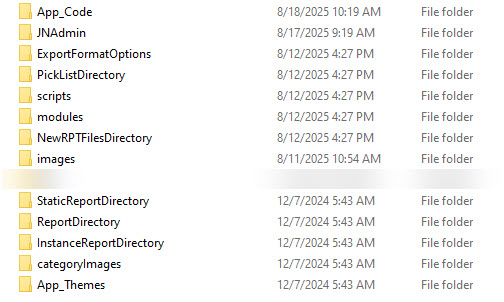
Alternatively, last option is to place all of your RPT files into the Web Portal directory called "NewRPTFilesDirectory". This will allow you to (from the new report interface), browse to that directory and pick the RPT file. Once you select the RPT file, Event Server will process the RPT file on-the-fly, and create a new web template for you. Some users may prefer doing reports one-at-a-time like this so they don't have to choose from a large number of XML templates in the drop-down.
Note, this automated web template creation process will assign the Global ID and Password from Report Runner Batch to be used to run Web Portal reports. If you need to configure some other ID/password, you will need to edit the XML web template manually using Report Runner Batch and configure the data connection information.
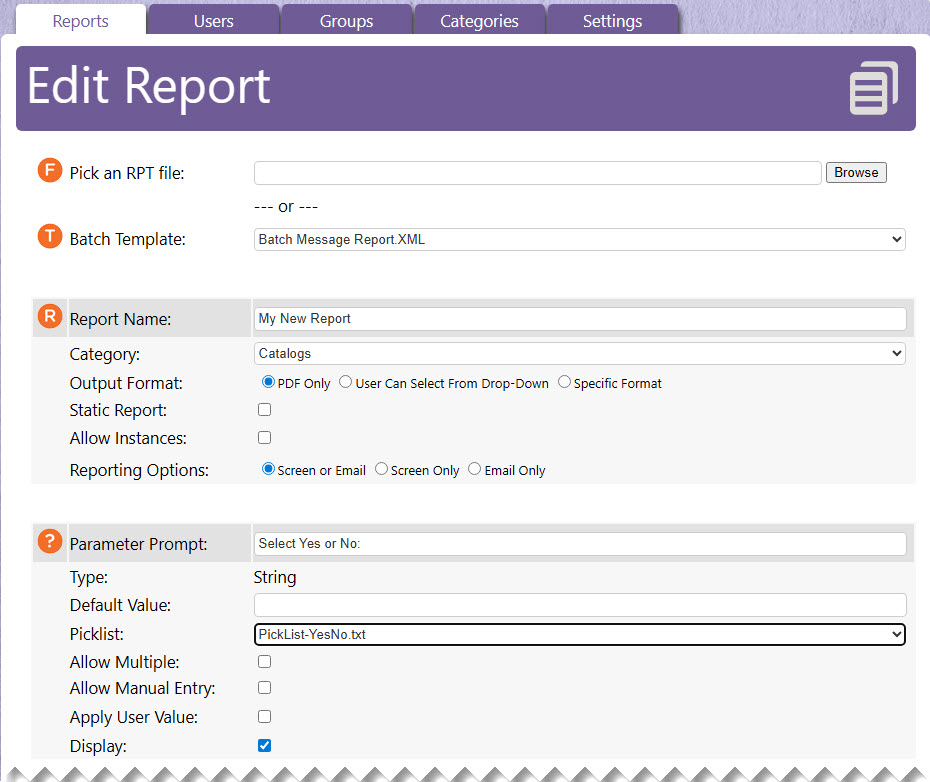
Ok, so you've selected your web template. Next, name your report, assign a category, configure your output options (PDF only or allow user to choose), configure usage of report instances, and configure your parameters.
Static Crystal Reports
Static reports are reports (like those output to PDF) that were run previously using Report Runner Batch. They can also be scheduled to be updated however often you choose (using the Scheduler in Report Runner Batch).
Why the static Crystal Reports option? This allows you to pre-run long running reports (imagine large sales or accounting reports that take an hour or longer to run) using Report Runner Batch. You could refresh these static reports at whatever interval you like and any time the user selects this type of report, it opens it immediately. There is, of course, no need to set up parameters or output options, because they are already run and saved to a specific format.
These PDFs are placed in the static reports directory ("StaticReportDirectory") where you can choose them using the Administrator interface.
Once configured, any user can access them without having to wait for them to run. We recommend any report that doesn't need to be up-to-the-minute information be configured as static reports.
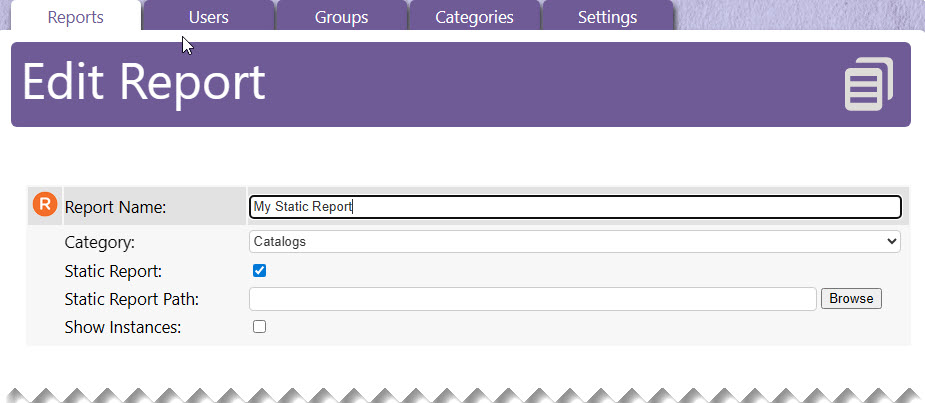
When creating a new static report, just select the "Static_Report.xml" template. This is a system template which modifies the report setup window for static report configuration.
Browse to Select the static report. This will display the reports found in StaticReportDirectory.
Note, a neat feature of Web Portal is the ability to generate a command line to open the static report... and if it's a static report that changes frequently, you can even have it auto-refresh in a browser window. Just set the refreshseconds parameter to whatever time value (seconds) you want it to refresh. If you want it to show a countdown (until next refresh) at the top of the window, just set showcountdown parameter to 1.
Static URL links (like to internal company portal documents)
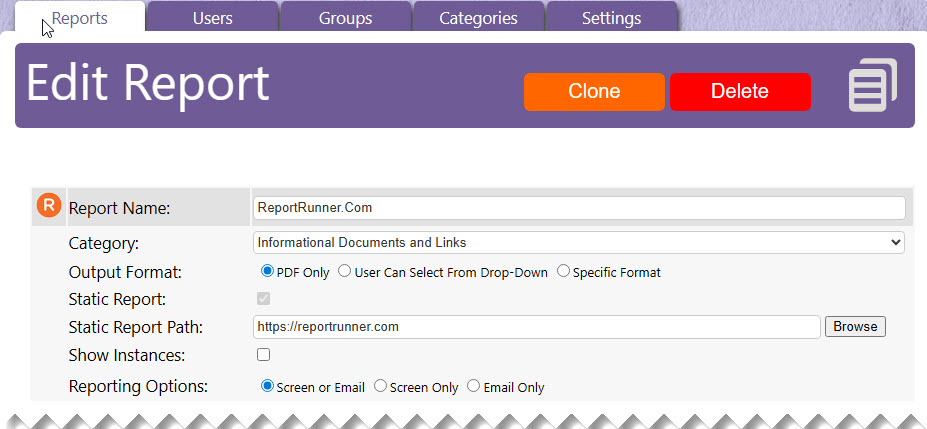
When creating a static URL link, simply enter the URL for the link instead of a static report path. Obviously, if it's a URL, it will start with http or https. You can create an unlimited number of links to internal and external resources. As with static reports, just select the "Static_Report.xml" template to get started. The example below links to our reportrunner.com site.
Note, you can of course ignore Output Format and Reporting Options. They are meaningless.
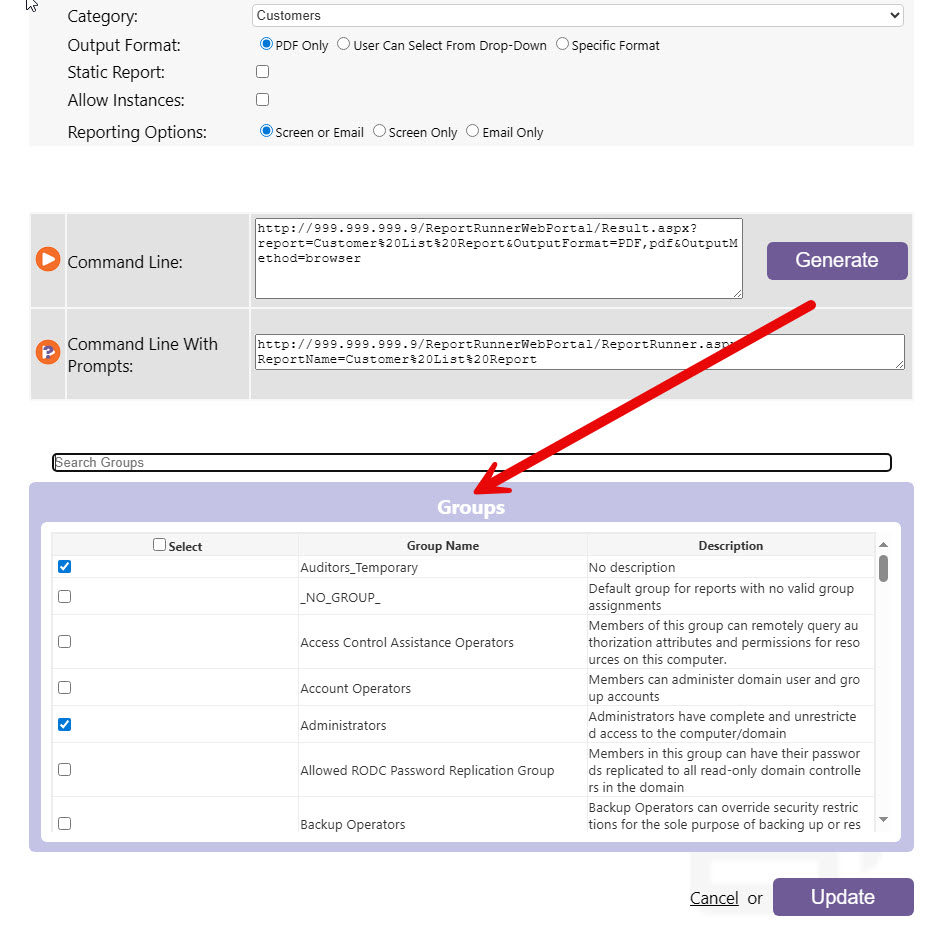
Assign reports to groups. When an end user logs into Web Portal, they can only see reports assigned to Groups they are members of.
You can assign a report to more than one group. Users only see reports their groups have been assigned. If you have 1000 reports created, but a user group has access to 20 of them, those users see ONLY those 20 reports, not all 1000.
Other Report Configuration Options:
Report instances allow Web Portal to retain previously run reports. This allows users to easily access a report they ran previously. You determine how many to keep, and Web Portal does the rest. The biggest benefit of report instances is it saves report processing time on the server, because users aren't re-running the same report over-and-over. For example, a salesman might run a report every morning at 8am. Let's say it take 5 minutes to run. If he wants to look at that same data later in the say, he doesn't need to rerun the report and wait 5 minutes; he can click the previous report instance and it opens immediately.
You have numerous options to configure parameters and picklists. You can change parameter prompting text (uses Crystal Reports prompt by default), assign a picklist, enter a default value, assign a user-based value, allow for manual values, and show/hide (display) the parameter. Most of this falls right-in-line with how you would expect the report to work. Assuming you know Crystal Reports, configuring the parameters should make sense and work as you would expect it to work.
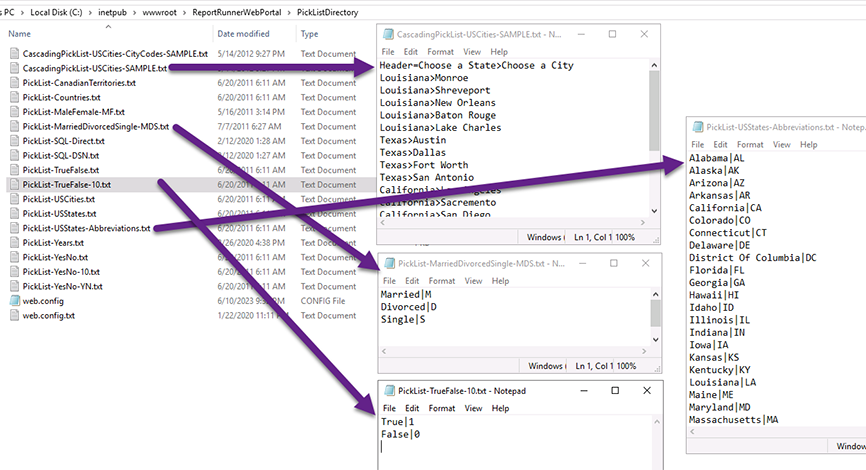
Picklists are text files stored in the PicklistDirectory. These picklist text files have multiple ways to be configured, and we use text files so you can configure them with a text editor like Notepad. Picklists can be static (values listed per line in text file) or dynamic (values are fetched when report is run by executing a SQL Select query). Picklists can also be cascading (choosing one value shows another limited set of values to choose from). Cascading picklists are only static at this time (you can't create cascading picklists with a SQL Select query).
Important: Cascading picklist files MUST start with the words "CascadingPicklist". All other picklists MUST start with "Picklist". The rest of the filename can be anything, but we recommend being as descriptive as possible.
Static Picklists: We have a number of default static picklists already defined in the PicklistDirectory folder. You can manually create a picklist simply by adding values to a text file, one line at a time. If you need to show one value, but assign a different value, add the pipe symbol "|" between each value. Click here to see a sample static picklist. In this sample, Yes or No is picked by user, but 1 or 0 is assigned to the parameter.
Cascading Picklists: Cascading picklists must be configured manually or you can create formulas in a Crystal Reports template and export values from a database to text using Report Runner Batch. Click here for an example of our cascading picklist format. The greater than sign is used to indicate a cascading value. Use the Header line to assign cascading headers/descriptions, too. In this example, users can pick a state in the US, then a region, then a city, and via the pipe symbol "|", a city code is passed instead of the city name.
Here are some examples of the "canned" picklists we include upon installation:
Cascading Picklists: Cascading picklists (as shown above) must be configured manually or you can create formulas in a Crystal Reports template and export values from a database to text using Report Runner Batch. Click here for an example of our cascading picklist format. The greater than sign is used to indicate a cascading value. Use the Header line to assign cascading headers/descriptions, too. In this example, users can pick a state in the US, then a region, then a city, and via the pipe symbol "|", a city code is passed instead of the city name.
Auto-Created Picklists: When your RPT is processed via Event Server, static parameter values stored in your RPT file will be extracted to auto-create static picklist files for you. These auto-created picklists are stored in your Event Server data folder (where your WebTemplates directory is located --- installation step #12) in a folder called AutoPicklists. The picklists are named based on the report name and the parameter name, so you know what it should be assigned to.
Important: You will need to MOVE any auto-created picklists from the Event Server AutoPicklists folder to the PicklistDirectory folder in Web Portal. We do not automatically store all picklists in the PicklistDirectory folder, because a number of reports (can) utilize the same picklist, and it's better to use one picklist for maintenance purposes. If you need to add a code to a picklist, and the picklist is used by 100 reports, it's much easier to add a code to one file than 100 files. Make sense?
Dynamic SQL-based Picklists: As of Web Portal 2013.5g, dynamic, SQL-based picklists are now available. It's as simple as configuring a connection string and writing a select statement. The SQL-based picklists can be a direct connection to SQL Server or, for any other datasource type, be based on a DSN. Click here for an example of a SQL Server connection. Click here for an example of a DSN connection.
Note, the format of the file must be as shown. The *SQL* at the top is a keyword to tell Web Portal this is a SQL-based picklist. The number 1 you see on the second line can be a 1 or a 2. 1 indicates one value is being returned. 2 indicates two values are being returned. If two values are returned, the 1st value is shown to use in picklist, and based on users choice, the 2nd value is assigned to the parameter.
*SQL*
1
Data Source=123.45.67.999,4120;Initial Catalog=monkeydb;Integrated Security=False;User ID=monkey;Password=Monkey12345;
SELECT invoicenum FROM invoices

or

SELECT invoicenum FROM invoices WHERE customerid = 'jnUserValue2'

