Configuring IIS to Run the Web API
Next we are going to configure the Web API (which we previously installed) in IIS.
Note, in our examples, we will be installing to a URL of demo.virtualtaskrunner.com. In your case, it might be vtr.yourcompanyname.com.
This is the exact process we used to configure the Web API that the Demo in our mobile app connects to and uses. All of our examples will be using IIS 10 on Windows Server 2022. You may see slight differences with other IIS and Windows Server releases.
The TLDR of the configuration is:
- Start IIS
- Create a .Net 4 app pool and set Identity to "LocalSystem" (necessary to give it permission to access the Windows Task Scheduler)
- Add Site and select the install directory you previously installed to and select the app pool you created in step #2.
- Configure your DNS for vtr.yourcompanyname.com to point to your server
- Create a security certificate and apply it to your new site (API) URL (we use WACS/Let's Encrypt)
Here are the steps in detail:
1. Start IIS
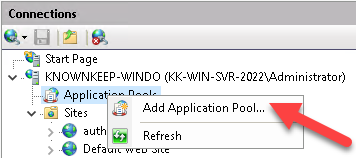
2. Create and configure a .Net 4 application pool. Right-click on Application Pools and select Add Application Pool.
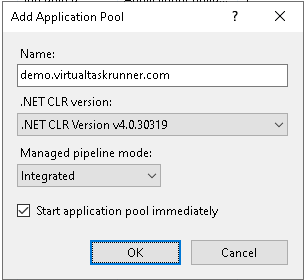
We like to name our pool based on the site using it (demo.virtualtaskscheduler.com). It should use v4 .Net CLR. Click OK.
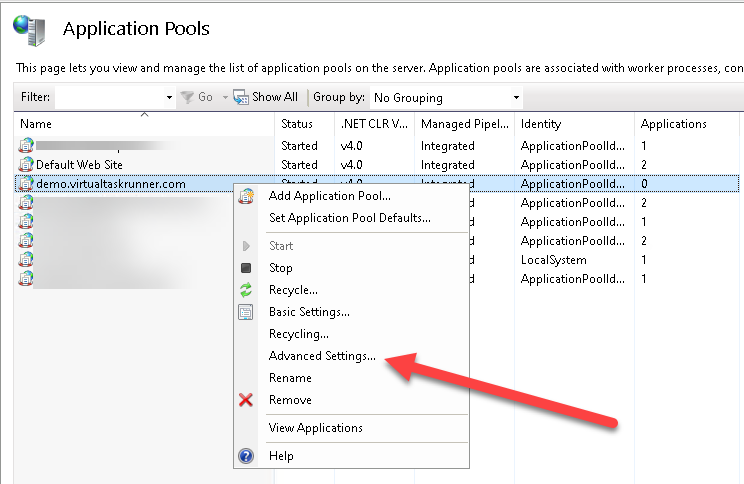
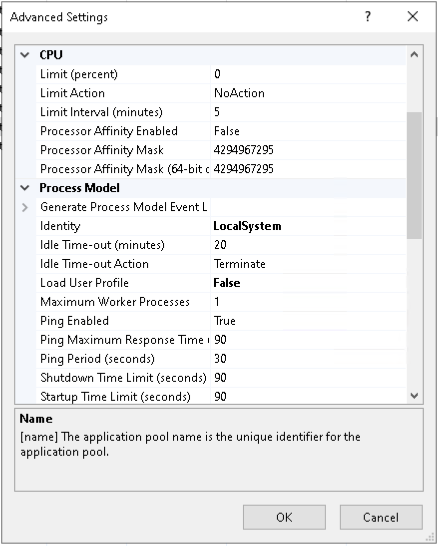
You'll see the new app pool listed. Right-click on it and bring up the Advanced Settings:
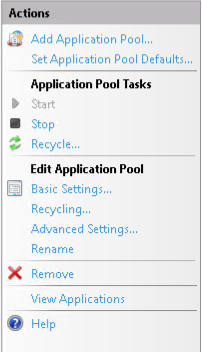
or select on right-side view here:
Change the default Identity ApplicationPoolIdentity to LocalSystem.
Why do I need to do this? I've never had to run a site/API with "LocalSystem". The reason is because this Web API connects to your Windows Task Scheduler. That's the whole purpose of this Web API... to interact with the Windows Task Scheduler. Without this permission set (the Identity gives it permissions), the Web API will fail. It must be able to both read existing schedules and request a schedule to run (when you choose to do it from the mobile app).
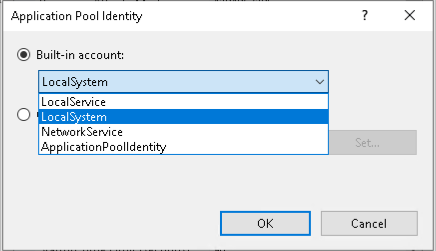
Click on Identity setting and the three dots will appear. Click those dots.
Change to "LocalSystem", and click OK.
Identity will now show LocalSystem in Advanced Settings.
You will also see LocalSystem noted in the App Pool list:
Next, using either right-click menu or right-side menu, click on Recycling. This is just to review default setting is set to 1740. You may adjust as you wish, but this will ensure the app pool is recycled every 29 hours. The Web API is small and does not cache anything (task info always has to be up-to-date), so recycling frequently will not cause any issues.
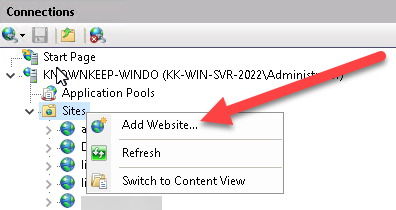
3. Next, we are going to add the site and select the app pool we just configured. Right-click on Sites and select Add Website.
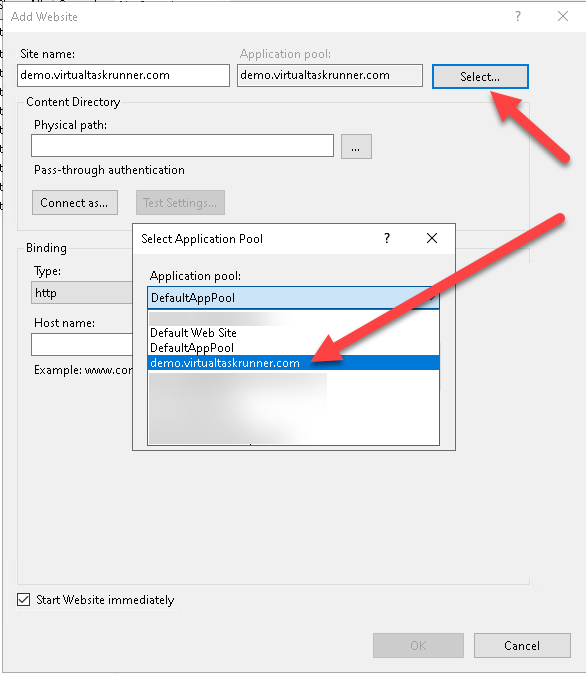
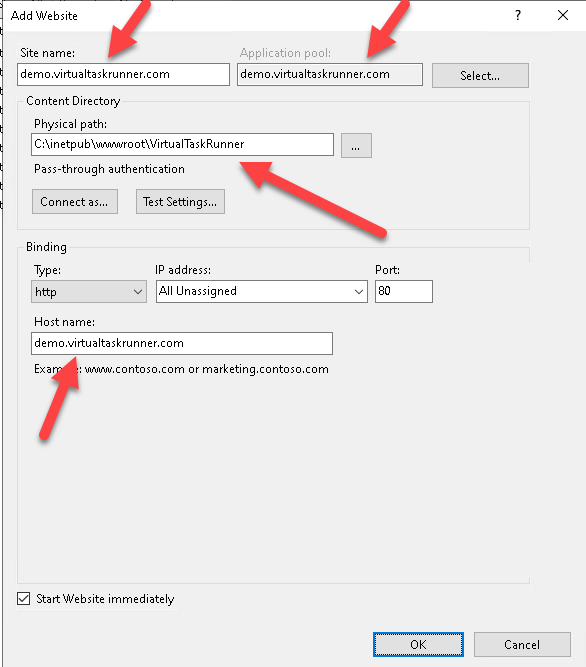
Name the site and make sure the correct app pool is selected. Again, we like to name our site the same as what the URL will be that accesses it. This step does NOT configure the URL... we are just naming it so when we see it listed, we know exactly what it is/does.
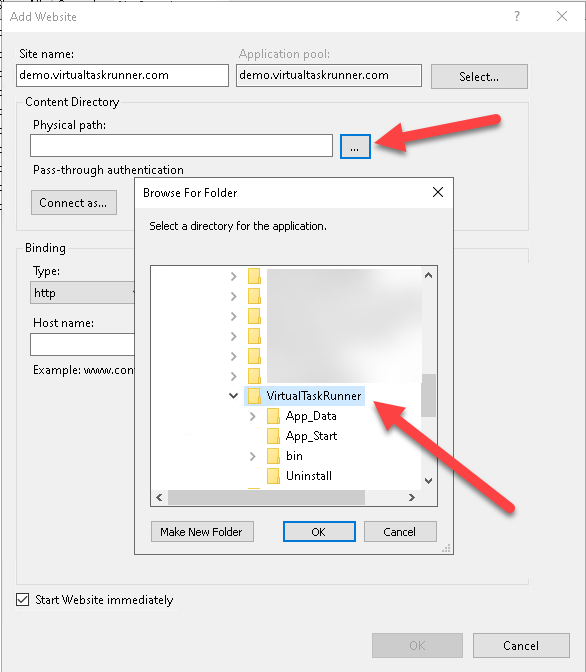
Next, configure the Physical path (where to find the Web API). Click the three dots to browse to the location where you installed Virtual Task Runner.
At this point, we've named the site, selected the app pool, and selected the directory where the application is installed.
We can keep the default Pass-through authentication. Since we are running the app pool with LocalSystem, that will give the application all the "power" it needs without setting an ID and password.
Lastly, configure basic port 80 HTTP binding and configure the URL to access this Web API.
Note, this is only TEMPORARY. Once we create a certificate, we will remove this non-HTTPS binding to port 80 later.
You should now see your new site listed with any other sites.
4. Next, we are going to configure an HTTPS certificate using Win-Acme (WACS) which handles the interactions with Let's Encrypt to create and renew certificates.
Note, before doing this next step, you should have configured your DNS (wherever/however you do that) to point your vtr.yourcompanyname.com domain to this server where you've installed Virtual Task Runner.
In our case, we configure our DNS Zone using CPanel/WHM. When we add an Address record, it looks like this:
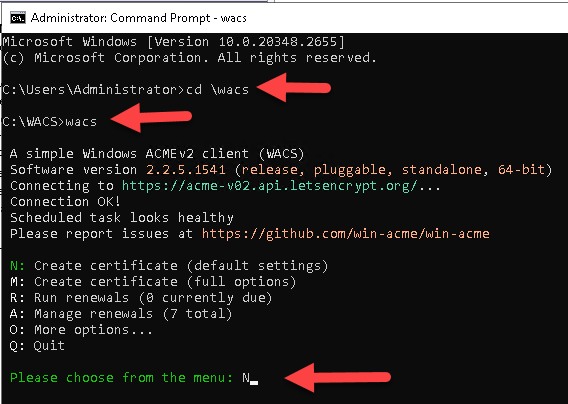
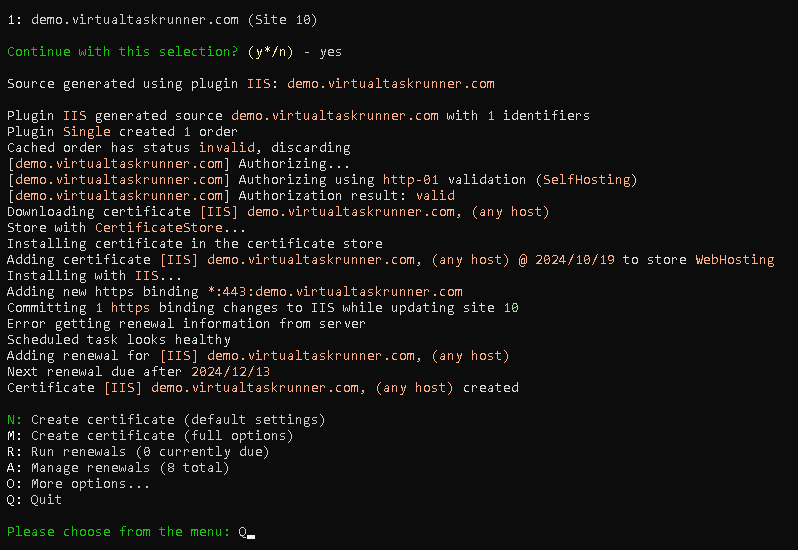
Bring up a command prompt window (run CMD), CD to \wacs, and run WACS.exe, and enter N for a New certificate:
Note, we will not be covering WACS installation itself in this documentation. This documentation assumes you already have it installed.
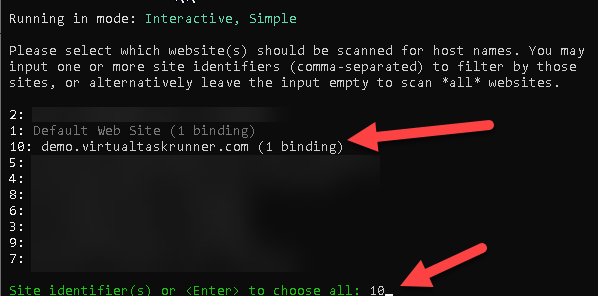
WACS should notice your new site. Enter the number that corresponds with the site (10 in our case).
Enter A for All bindings.
Enter Yes to continue. WACS will contact Let's Encrypt, obtain a new certificate, install it, and bind it to port 443 in IIS. Once complete, enter Q to Quit.
Now let's verify the certificate and bindings in IIS (and remove the previous port 80 binding to ensure all connections to Web API are secure/HTTPS.
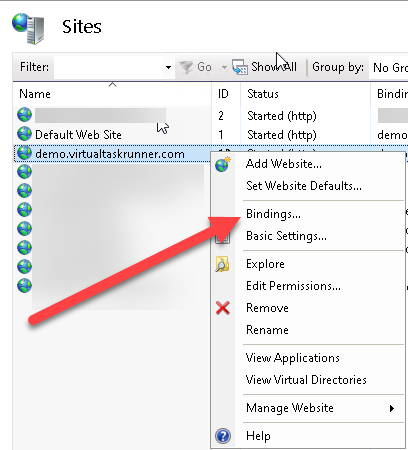
When you go back to your Sites in IIS and Refresh, you should see your site binding has been updated.
Right-click on site and click on Bindings.
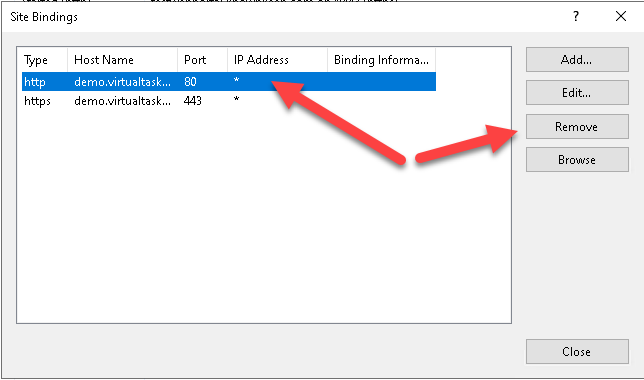
Delete/Remove the binding to Port 80 and Close.
Your Web API is not fully configured in IIS itself.
4. Let's test the Web API and configure it (modify Web.Config).
Out of the box, we have created a "Hello" controller which is opened by default when you call the URL in a browser (this can and should be disabled later -- we will show you how). Go to your browser of choice and enter the URL you just configured:
https://demo.virtualtaskrunner.com
It should show this in your browser:
This initial two errors you see are OK (for now) and expected. It should confirm the VTR database was created (this logs IP addresses of who is accessing the Web API), the license and API key have not been set yet (noted as "errors"), include and exclude filters have note been configured (these are filters for the tasks shows/accessed via the mobile app), whether test mode is on or not (test mode allows you to see tasks in mobile app, but not run them), whether logging is on (logging of IP addresses), and finally the current version installed for the Web API (your version number will increase/change as we release future updates).
If this initial "Hello" is working, the site is running and is accessible. If it is not working, then you missed/skipped a step. Go back and review previous steps.
Assuming it is working, let's begin configuring the final settings to get the Web API ready to be called from the mobile app.

